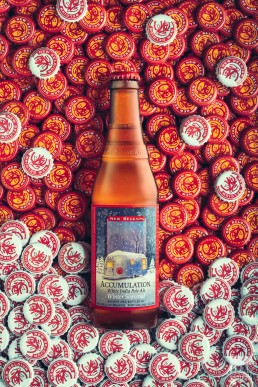
I got inspired to create these images for New Belgium Brewing after picking up a six-pack of their Pumpkick Fall Seasonal beer and seeing the pumpkins on the front porch and snow in the forecast.
I had fun shooting these on a self-imposed short deadline: only 2 days for conception, materials gathering, setup, and shooting. Retouching and post processing took another day or so. Below is a “behind the scenes” about how I created these images, but first, here are the final images.
SUPPLIES
The only supplies I needed to get were a pumpkin ($12) and two six-packs of New Belgium ($18). The other items used in the photo that I already had were bottle caps and distressed wood planks.
EQUIPMENT
I shot with a Canon 5D Mark III with the Canon 100mm 2.8L Macro lens. The lighting was a single Paul C Buff Einstein 640ws monolight with a 47″ PCB Octabox as the light modifier. I used a couple of handmade reflectors and a diffuser panel as well (detailed below).
SHOT: PUMPKICK
For this image, I elevated a barn wood board in front of the pumpkin, about 2″ from the table the pumpkin was sitting on. I placed the beer bottle about 1″ or so in front of the pumpkin. The softbox was placed to the direct right side of the bottle, a bit behind center and with the center of the softbox at a height of about 2 o’clock on the bottle, pointing slightly downward.
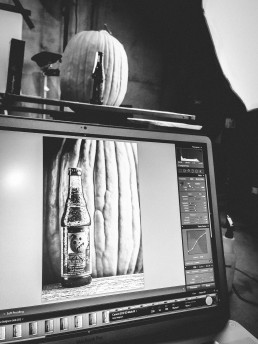
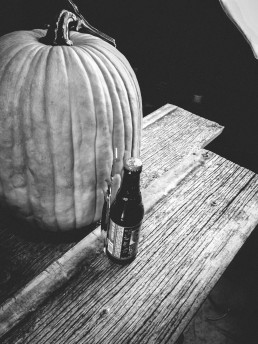
I misted the bottle a bit to give it the cold, sweating look, but was careful to keep water off of the label. I found that water on the delicate printing proved more distracting than beneficial in completing the look. Hidden behind the bottle, I added a carefully cut piece of foil that I had sprayed mounted to a thin board. This bottle-shaped foil board was then turned slightly behind the bottle so that it would catch the light from the flash and send it through the bottle, creating a satisfying orange glow through the glass. Without this foil reflector, the glass stays an opaque dark brown that just doesn’t look right. Finally, I added a second larger foil reflector off-camera to the bottle’s left side to provide some fill on that side. Lastly, I used a another large diffuser screen placed about a foot in front of the octobox. This diffuser screen is a piece of white semi-transparent cloth that I mounted to a 5’x3′ wooden frame with staples (much like a canvas wrap). The large diffusion screen helped to further soften the light hitting the bottle and helped the light source reflections to not have as hard of an edge. It sapped it a lot of light from the Einstein though, and I’ll probably look into a different material for next time.
SHOT: ACCUMULATION ALE
I have a collected every beer bottle cap I have come across for the last 9 years. Someday, I plan on using them for an unknown project. I don’t know what, but it will be awesome, with hundreds of bottle caps all of different breweries, colors, and designs. For this project, they definitely came in handy. I spent an hour or two sorting through the bags, pulling out the New Belgium caps.
I then spent another hour carefully arranging all of them out on a piece of black mat board. For the first shot, with Pumpkick, I used only the regular red caps. And for the second, I built the seasonal white caps up on top, creating a literal “accumulation” of snowy caps for the Accumulation White IPA.
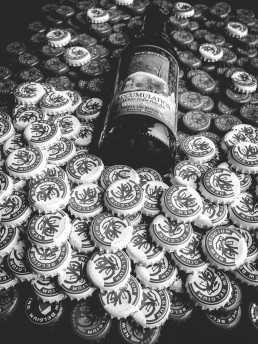
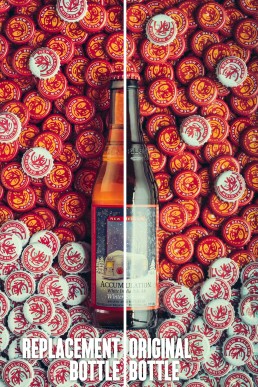
I placed the mat board full of arranged caps on the floor and setup the tripod to look directly down. I again used the single Einstein light with octabox, off to the right side. I could get quite as low as I wanted with the huge 47″ octabox. If I were to shoot this again in the future, I would raise the cap/bottle scene up off the floor a bit to give me more flexibility in placing the lighting. From there, I set to work shooting and arranging the caps until I was able to minimize any awkward reflections and make the caps appears evenly spread. For the final shot, I added a 12″x12″ white card reflector to the left side of the scene to provide some fill and used the diffusion screen in the same way as the Pumpkick shot.
Having the bottle lying down directly on top of the bottle cap background presented two challenges: one) the airspace/bubbles in the bottle floated to the top (meaning you would immediately see it was lying down, not sitting upright); two) there was no way to easily add a reflector behind the bottle to channel light through the dark glass. I solved both of these problems by shooting a separate image of each bottle and compositing it into the final image. I stood each bottle alone on a dark background, with the foil reflector behind it, and the softbox in the same position off to the right and reflector on the left. This allowed me to keep the airspace up top, light the glass from behind, and give me more control over lighting the label properly to minimize glare.
